Tuesday, July 31, 2012

Get Your Craft On #8

does it bother anyone that i changed my party time to wednesday?  i felt like doing it on monday was just a little too soon in the week...  

so a few updates:

-next week Amie over at Pinkapotamus will be celebrating her blogiversary and hosting lots of giveaways.  i will be giving away one free item from my Etsy shop, excluding the laptop sleeves.  be sure to hop over and follow so you didn't miss any of the giveaway action!!

-for the last 2 weeks in August I will have having a 'back to school' sale in my Etsy shop!  I will be posting the code in my blog and on FB so be sure you follow the Gilded hare! 

i love dinosaurs, i love gloss white, and i love neon...ergo this project is one my favs!!

lately i've really been digging shrinky dink and this is such a cool projects for parents!!

learn how Fotini made this awesome reclaimed bench!

congrats and thanks for linking up everyone!!

 
and for this week's party:  
-only post projects that you have done yourself-preferably a tutorial
-post my button somewhere on your blog or post
-follow my blog and/or like me on facebook
-check out other posts and leave comments!!  


the gilded hare

DIY Stag Earrings

okay, another anthro knock off...i just couldn't resist this one because it's so similar to my antler necklace.   the photo on the left is my inspiration from anthropologie: crowned stag earrings for $198!!  you can find it here .  the photo on the right is my cheapo version made out of sculpey. 

supplies:
-2 fish hook earrings
-2 jump rings
-polymer clay
-(2) 1 inch pieces of wire
-pliers
-paint (optional)

it's really pretty simple, just shape the clay into the general shape of the antler.  then gradually start to the taper everything down so it doesn't look so chunky (unless you want it to look that way).  bake according to the clay you're using.  using your pliers, make a small loop on one end of each piece of wire.  insert the straight end of the wire into the end of the antler after you finish sculpting it.  attach the antlers to the fish hooks using the jump rings. 

i used some gloss white nail polish as a finish on mine but you could make them any color...

and that's it..seriously...you just made a knock off of $200 earrings for probably less than $5!?  crazy right?  i mean sure the anthro version is a lot more thin/delicate looking than mine and made out of mammoth ivory but still...i'd rather have my $5 version.

linking up here.

My entry into Make the Scene Monday #33  is sponsored by Appliances Online & Bosch Washing Machines.

Monday, July 30, 2012

New Etsy Packing Design and Blog Challenge Day 12: Typical Day

ooooookay so i may have forgotten that i started this blog challenge way back...but i'm back in the game now lol!

but first....my new packaging design for my Etsy shop!!


these are really simple to make and i think make my items look really custom!  first make your design in whatever program you're comfortable with.  print off a tester to make sure it's going to fit whatever item you're trying to wrap.  then cut a piece of kraft paper to size, use double sided tape to secure it to a regular piece of computer paper and print like normal.  then use a decorative punch all along the edges of the kraft paper and wrap!

what d'you guys think?  yay or nay?  before i used the kraft paper and wrapped baker's twine around and tied off with a bunny tag.  i like how with these the items are labelled so it's easy to tell exactly what it is when i'm looking through my inventory.


today's challenge is supposed to be outlining my whole day...well i wanna start by saying that i'm really a pretty boring person...i spend a lot of time laying around thinking about things that i could and should be doing lol.

so first up, since my new job starts on wednesday and i have to get up at 6!!  i've slowly been trying to condition myself to get up earlier.  i've been getting up before 7 for the past week but i haven't really been going to sleep earlier so i've really only succeeded in making myself sleep deprived.  and since i'm really tired my first few hours of consciousness consist of me laying in bed, half awake trying to surf pinterest on my phone with my dry blurry morning eyes.  i'm practically blind without my contacts and it's too early to wear glasses so of course my phone is inches from my face...

and that continues until almost 9, yeah i wasted 2 hours on my phone...  but i had a strangely productive morning.  first i cleaned up my rabbits' litter boxes 'cause they were gettin' nasty!!  for some reason, grumbles has been consuming a LOT of water lately which means his litter box ideally needs to be changed almost every other day...which means i might do it twice a week.  yeah i make him live in his own filth...

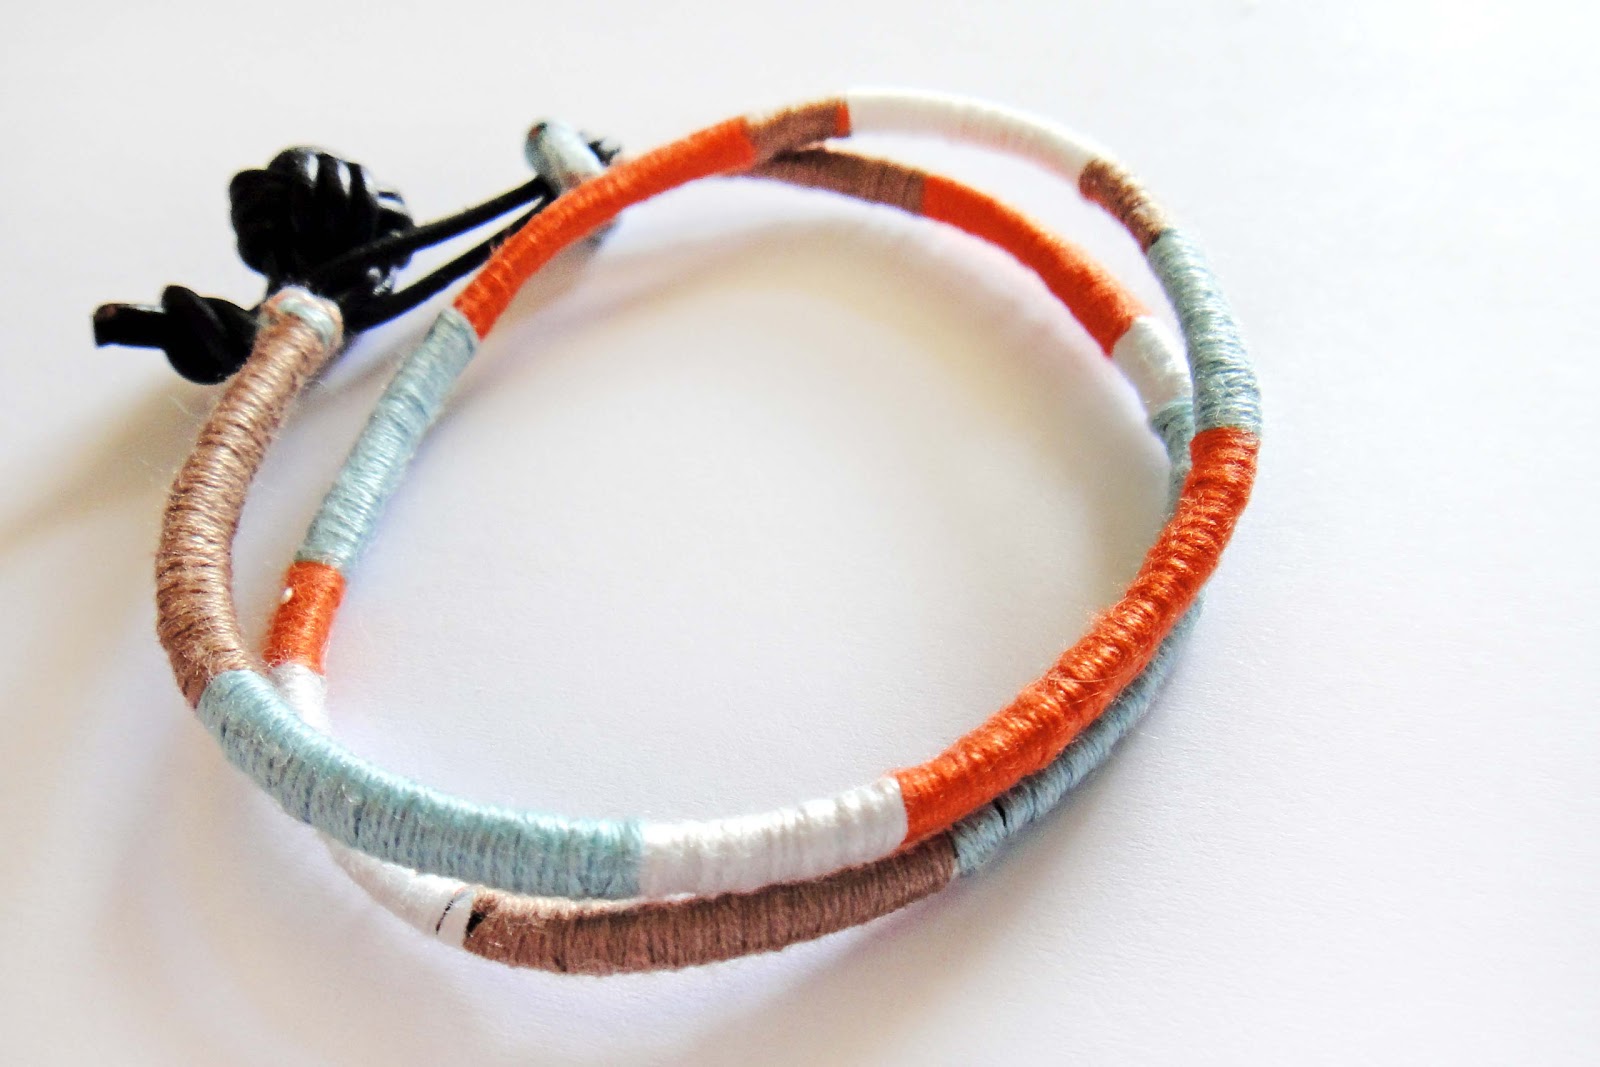
then i actually made 2 bags, that i found on pinterest lol.  the first is from a tote-to-go from ikat bag and the second if a card wallet from sew passion.  i will be posting photos and my thoughts about these 2 tutorials later this week.

then i made a custom order for my Etsy shop.  (now that i'm writing it down it actually kinda sounds like i did a lot today...)  so i took photos of the order so i could post it, i also took photos of my new packaging design for some items in my shop.  then photoshoped them and posted them on etsy.

after that my day gets sorta lazy...i cleaned up my makeshift craft area.  i always just toss the threads down when i sew so i'm left with a big mess in the end!

then i got back on my laptop looked up houses back home that i wished i could buy...it still blows my mind that as much as i pay for rent here, i could be paying mortgage on a house back home!!  of course now it's blazing hot and the breeze has basically died so it's just hot air sitting in my apartment.  so i took a 15 minute nap.

then i made lunch for me and my boyfriend (eggs, toast, and oatmeal raisin cookies), went grocery shopping, printed off a new calendar for the year..don't judge i'm just now gettin' around to it!!  i found a really cute one from tomkat studio, it's clean and simple with a pop of color.

and now i'm writing this post whilst i make broccoli and corn for dinner tonight (bf is making pork steak if he ever gets off work).


and that was my monday!  hmmm maybe i should write down what i do every day, seeing it all written up makes me feel like i did so much hah!

Sunday, July 29, 2012

DIY Carved Filigree Earrings

today's tutorial is a knock off of some anthro jewelry.  i love basically everything from anthropologie...but not so much the price tag.  

the photo on the left is my inspiration from anthropologie-carved filigree earrings for $68!!  you can find them here.  the photo on the right is my, less then $5, version!  

 supplies:
-8 jump rings
-2 fish hook earrings
-shrinky dink
-sharpie or colored pencils
-nail polish or paint

if you've never worked with shrinky dink before you can also read my other project here

start by sketching out the filigree design you want.  you can use colored pencils or sharpie to fill in your design.  i wanted a sort of scribbled look so i didn't completely fill it in.  then make 4 small teardrop shapes and 2 large tear drop shapes.  (i ended up rubbing off the sharpie scribbles on these parts and i made the large teardrops smooth on top like the smaller ones.)  cut out your designs and punch your holes. 

next, bake your shrinky dink as per instructions.  you can use paint or fingernail polish to paint the teardrop shapes.  and it's read to assemble.  i used 4 jump rings per earring, no the 7 pictured.  

and that's it!  pretty simple right?  and altogether i think they cost less than $5, versus $68!  of course if you're buying all these supplies new it will cost more but once you break it down based on what you use they're really cheap.  i wish i had made the teardrops a bit bigger and fatter but i really like the way they turned out!

linking up here

My entry into Make the Scene Monday #33  is sponsored by Appliances Online & Bosch Washing Machines.

Friday, July 27, 2012

DIY faux pallet crate

i want to start of by saying that i love pallet furniture.  i love pallet chairs, pallet tables, pallet gardens, pallet beds, you get the idea.  but most of all, since i love organizing and storage, i love pallet crates.  i love the rustic worn look they have, and if they have casters even better!  storage with portable pallet-y goodness!

unfortunately, whenever i look for pallets they always look like they're in really bad shape.  and i tried taking one apart once and it was really rather unsuccessful...in fact i have the sad remains still on my lanai to remind me of what a horrible failure it was lol.  i also read some articles about how some pallets are chemically treated and it can be really difficult to tell which ones those are.  and since i have 2 bunnies who have to nibble on everything i decided that maybe using pallets wasn't the best option for home decor.  

but i still wanted some storage crates.  so i went and bought some pine lumber and made this bad boy:


first, apparently city mill really only sells pine and mahogany.  and i wasn't gonna shell out for mahogany when i was going to make it look old anyway so i was stuck with pine.  which is probably for the best because it still ended up being about $15 just for the lumber!  already way more than i wanted to spend:/

i bought (1) 1"x10"x48" and (1) 1"x12"x48" here's how i had mine cut: (keep in mind that lumber is actually smaller than what it's marked so instead of 1" it's actually more like 3/4")

the 1" x 10" will be the sides-first, i had them cut it into (2) 23.5" x 10" pieces.  then i had them split both those pieces in half (hotdog style).  so you should end up with 4 pieces that are 23.5" x 5" (technically a little less than 5").  originally i had them cut the pieces to 24" because i forgot that lumber is actually smaller than marked, so when i got home and double checked i had to take an extra 1/2" off all 4 pieces.  super annoying when you're working with a leatherman tool...

the 1" x 12" will be the front/back and bottom.  i had them cut (2) 12" x 12" and (1) 22" x 12" pieces.  you can cut holes to make handles in the front/back like i did or you can buy handles from the hardware section.

i stained and sealed all the pieces first then put it together.  i started by attaching the front and back to the bottom piece then added in the sides.  the construction is really pretty simple.

and i had to spend $12 on casters so the project was already almost $30!  which again, was way more than i originally planned on spending.  but i still liked the way it turned out.  city mill also has this little cart in the lumber section of scrap wood for 50 cents a piece.  when i was there they had a lot of chemically treated 2x4 pieces so you might be able to make a crate for much cheaper.


as for the finish, i ended up using minwax driftwood stain.  i like the way it turned out but i wish it had more of gray tone.

i had originally planned on using the vinegar/steel wool technique that is supposed to oxidize the wood and give it a really aged appearance.  well i put one piece of superfine steel wool into apple cider vinegar for one day and tested it out.  when i took the wool out it looked the same but i could definitely see little pieces of it floating in the vinegar and it smelled pretty rusty.  the first few pieces i tried had more of a brown finish rather than the gray i was looking for.  i waited a couple days and it was slowly starting to turn a light gray color but it was still really inconsistent.

then i stumbled across a post where the writer would leave the solution sitting for weeks!  well i didn't really feel like waiting around for weeks with a pile of wood in my kitchen so i just bought some stain instead.  i still have the solution though so maybe next month i'll make something else that i can try it out on...

linking up here

have a great weekend!!

P.S. if you're interested, you can find the anthro rosette pillow here and the chevron blanket here

Follow my blog with Bloglovin

My entry into the Share It Link Party at The Winthrop Chronicles is sponsored by Appliances Online and their best Range Cookers.

Tuesday, July 24, 2012

Get Your Craft On #7

yay so i officially have a 'real' job!  something that is actually sort of related to my degree lol.  it pays more than twice as much as my job now, unfortunately it's only temp so 3 months from now i might have to look for a new job...

on to this week's features:

i loooove the look of this dyed rope!  i like the stripes but i'm also envisioning an ombre vase of rope-wrapped goodness!

i love the look of this room, very sleek and modern.  almost everything in this room is a thrifty DIY-the nightstands, lamps, pillowcases, even the picture frame!  

save an old garage door by turning it into a rustic outdoor bench!!

congrats to you clever crafters and thanks to everyone to who linked up!


now for this week's party:  
-only post projects that you have done yourself-preferably a tutorial
-post my button somewhere on your blog or post
-follow my blog and/or like me on facebook
-check out other posts and leave comments!!  


the gilded hare

Tutorial: DIY ColorBlocked Friendship Bracelet

Update: i am now selling these bracelets in my Etsy shop here

i'm not really sure why but i really like making friendship bracelets.  i almost never wear jewelry and i have a giant pile of them already, but if i ever feel the craftin' itch and i'm not sure what to make...i usually settle for a good ol' fashioned friendship bracelet.  

the first time i ever saw someone make a bracelet like this i was in paris and those guys can crank these babies out in seconds!  they're really simple to make, all you really need is embroidery floss.  i decided to use leather cord for the 'skeleton' of mine and a monkey's fist knot closure (you can use a button instead).  i'm not even going to try to explain the knot but the animated tutorial i used is here.  if you use the monkey's fist it will take about an extra foot of cord.  

once you have picked out your floss, cut them to roughly double the length of the bracelet (if you want a double wrap bracelet cut the floss 4 times your bracelet length).  then, with all the floss together as one cord, tie it around the 'skeleton' of the bracelet making sure the short ends point downward.  i'm not sure what to refer to the leather part as so i'm calling it the bracelet's skeleton...  

to start wrapping, separate the floss color of your choice.  pull all the other colors downward and start wrapping the chosen color around the other floss and 'skeleton'.  to change colors repeat the process.  separate the color you want to switch to, pull all the other floss downwards, and start wrapping.  you will see a slight break at the color change.

if you want to get fancy, you can add stripes!  just separate 2 colors and wrap as you would normally.  this is a little trickier because you have to make sure the floss doesn't get twisted and stays even.

and if you want to get really fancy, you can do this weird little double twist thingy.  separate 3 different colors of floss-2 contrasting and 1 background color.  start wrapping with the background color as usually but make sure the 2 contrasting colors stay unwrapped.  take the first contrasting color and start wrapping it on top of the background color with slight spaces in between.  take the second contrasting color and wrap it in the opposite direction.  and continue wrapping as normal.

when you get to the end, choose the color you want to end on and trim everything else down.  with the last color wrap over the ends of the other floss and tie off.  i used some liquid stitch on the ends of the floss just to make sure they stay.

and voila a new friendship bracelet!  once you get the hang of wrapping it goes pretty fast, it took me only about 30 minutes to make this double wrap color blocked bracelet.  of course, if you use any of those fancy techniques it might take you a bit longer.

happy crafting!

linking up with these craftalicious blogs!

My entry into the Share It Link Party at The Winthrop Chronicles is sponsored by Appliances Online and their best Range Cookers.

Sunday, July 22, 2012

Tutorial: How to Carve Linoleum Blocks

i did a lot of carving in high school, mostly bas relief type stuff, but i really liked it.  i think it's where my passion for sculpture really started.  surprisingly though, i think i only did block printing once.  lately i've been really wanting to do something with a tribal print; but rather than using freezer paper and cutting out each individual piece, i decided to try block printing instead.  

supplies:
-pencil (for sketching designs)
-lino blocks
-lino cutting tool
-x-acto knife

i got my lino blocks (unmounted) and lino carving tool from dick blick.  if you buy the unmounted lino blocks it's cheaper but you also end up with a lot of blocks.  so if you're only making a few stamps i'd go with mounted.  i got a set of carving tools which is somewhat nifty because the different heads fit inside of the handle.  on the other hand, the blades are all pretty dull and some of the ends are pretty jagged.  basically it made me wish i had bought my own instead of leaving them in storage in oklahoma.  but it got the job done.  

first start by sketching out your design onto the block.

then use the xacto knife to trace your design with a deep, smooth cut.

then use a U-shaped gouge, my personal fav no one likes the V-shaped gouges...and carve towards your design.  you should be applying a slight downward/forward motion toward your design and you should automatically stop when you reach the your original cut with the xacto knife (unless you're applying too much pressure).

continue all the way around your design.

to clear out the rest of the area, make gouges away from your design.

and that's it!  as my high school teacher always said:  always carve away from yourself, never point the blade toward yourself or your hand.  otherwise you'll end up stabbing yourself...eventually...no matter what.


i think i'm going to use these to make some printed t-shirts and maybe some curtains.  i think they'd make some pretty snazzy curtains but i'm not entirely sure i want to commit myself to replacing my blinds just yet...

linking up with these blog-a-licious blogs!

Thursday, July 19, 2012

Tutorial: Iphone Wallet

remember my travel kit organizer thing here?  well, i was messing with mine a couple days ago when i realized it's almost the exact same size as my iphone.  and since i usually hate carrying around purses because i never have anything to put in there, i decided to make a little iphone wallet.  


you can basically follow the same tutorial with some minor changes.  first, instead of the pieces being 6" tall i made them 6 1/2".  this is basically to make sure that it's long enough for an iphone with a thin case.  

next, instead of putting the zipper compartment on the inside, i put it on the outside.  now you can use it for change, headphones, lip balm or whatever else.


for the interior, instead of using the 3 pieces like before, use one solid piece of your main fabric.  then make one giant center pocket for the phone (basically the same as before but don't sew the separate pockets).  and make pockets for your cards.  conveniently i still had extra pockets for hair bands and bobby pins.  

and now you have a cute little iphone wallet.  or just plain wallet if you prefer to use the bigger pocket for cash.  it's a pretty versatile pattern really.

the original travel organizers are for sale in my shop here and i will be posting these iphone wallets once i get a couple made.

linking up here!

Tuesday, July 17, 2012

Tutorial: Upcycle-Rope Shoebox

okay so like 6 months ago i saved on my old shoebox from the trash with plans on dressing it up and turning it into something awesome.  well i ended up just covering it with drop cloth fabric and then kind of forgetting about it.  at the time i couldn't really decide on how i wanted to embellish it so i just filled it with junk and put it work.  

well, i saw this Upcycled Kleenex Box from Southern Flair Crafts in the GYCO party a couple weeks ago and i knew that was how i wanted to finish my box.  it's so similar to my rope containers i don't know why i didn't think of it before!  

in the tute from Southern Flair Crafts, she covers the box with rope first then makes the liner.  but since i already covered mine with drop cloth fabric i jumped right into the business of rope covering.  


i started by glueing the end of the rope down one side of the box.  this way the end of the rope isn't exposed on the top of the box and you can't really tell that there's a bump there after you wrap the rope over it.

and just keep wrapping and glueing your rope around the box.

and since my box was already covered/lined with fabric i didn't have to worry about making a liner.  i think it's actually a bit easier, especially if you don't like to sew you can just hot glue the fabric to your box.  and here's my box back in place hiding all of my boyfriend's essential toiletries.  if you're interested in that little magazine bowl you can find the tutorial here.  he got saved from the trash too:)


happy up-cycling!!  

linking up here!